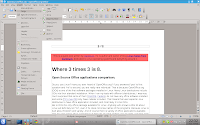
I will take text document in .odt format for the test purposes. It is text of my guest posting, if you can read it on screenshots. Text is about 5 pages long. Let's assume that I need to add page number and total number of pages at the top centre part of each page.
OpenOffice.org Writer
 There are just 5 steps to fulfil this task in OpenOffice.org Writer.
- Add header. Choose menu Insert - Header - Default. After that, you will see the frame at the top of each page which shows borders of the header area. Don't worry, these borders will not be printed, they are only shown for your convenience. If you need to do page numbers at the bottom of the page, you need use menu Insert - Footer - Default.
- You need to position cursor to header area, if it is not there. Double-click somewhere within the border. After that, we do two obvious steps:
- Add Page number. Choose menu Insert - Fields - Page Number.
- Add Page count. Choose menu Insert - Fields - Page Count. We are almost there. The thing which is still outstanding is some bells and whistles.
- Format text, for example centre it and add some static text (1 of 5). You can use your usual technique here.
KWord
KWord is slightly different to OpenOffice.org Writer. Here we need to format headers (or footers, if you prefer) separately for odd and even pages.- Add header. Choose menu Format - Include document headers. You should see rectangle at the top of the page. Again, if you want to place page numbers at the bottom of the page, choose menu Format - Include document footers.
- Activate headers frame. Double-click it. Here are 2 main steps.
- Add Page number. Choose menu Insert - Variable - Page Number.
- Add Page count. Choose menu Insert - Variable - Page Count.
- Format text, for example centre it and add some constant text (1 of 5). You can use your usual technique here. Now we are done with odd pages. Unfortunately (or fortunately) we now need to do the same for even pages.
- Scroll to the second page.
- Activate headers frame. Double-click it.
- Add Page number. Choose menu Insert - Variable - Page Number.
- Add Page count. Choose menu Insert - Variable - Page Count.
- Format text, for example centre it and add some constant text (2 of 5). You can use your usual technique here.
AbiWord
General technique for AbiWord is the same as for OOo Writer. But menu paths and approach is slightly different.- Insert Page number. Choose menu Insert - Page Number. You should get a pop-up window. Here you can specify where you want to see your page number: top or bottom; left, right or centre. As a result, system will automatically create frame for header or footer, put page number into the frame and position it. It's easy, isn't it? But I also need page count to be there. So I continue...
- Activate header frame. Double-click it near the page number.
- Insert Page count. Choose menu Insert - Field... In the new window select Numbers - Number of Pages.
- Format text, for example centre add some constant text (1 of 6). You can use your usual technique here. You can see that AbiWord counted 6 pages in my document whereas other text processors only found 5. That is because AbiWord creates bigger frame for the header. Bigger header means less space for main text, so some text got wrapped to page 6.
Update: If you want to see video recordings with above mentioned HowTo's, please follow the link.
Do you like this post? Do you want to support this blog? Please consider Buying Linux CDs for financial support, or simply subscribe FOR FREE for moral support.


LyX: Choose the right document style and let LyX figure it out.
ReplyDelete@Hans Bezemer:
ReplyDeleteAs far as I understand, LyX is a visualisation addition to LaTeX. I tried that one without much success. Mostly because LaTeX in my opinion is oriented on different tasks.
Sorry, no. Lyx is more than that. If one wishes Lyx can be used as a word processor without ever typing LaTex code.
ReplyDeleteT.
@Tangent90:
ReplyDeleteThanks for info! I'll try to have a look at Lyx!
@Tangent90:
ReplyDeleteI had a look at LyX. Unfortunately, it is still intended to use for big publications. Too massive tool for my everyday purposes. It would be unfare to write a review about the product I don't understand to the very bottom.